bởi
bởi 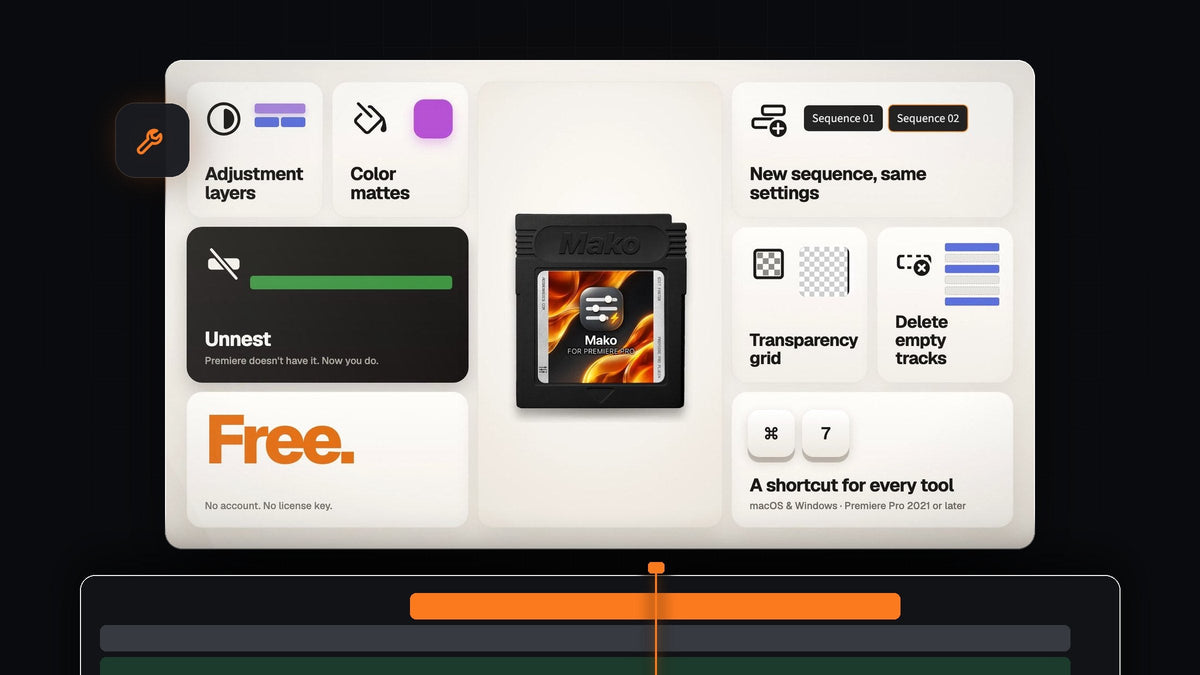
Mako is a free Premiere Pro panel that puts the jobs editors repeat dozens of times a session one click away: adjustment layers, color mattes, new sequences, the transparency grid, unnesting and clearing out empty tracks. In Premiere Pro each of these normally means a menu, a dialog or dragging something in and trimming it to fit. With Mako you click a button and it is done, right where you need it.
What Mako does
Mako is one small panel with six buttons that docks right next to your Tools panel. It uses Adobe's own Spectrum icons and follows your panel brightness setting, so it looks like part of Premiere Pro.

- Adjustment Layer. Adds an adjustment layer over the selected clips, on the first free track, usually in a few hundredths of a second.
- Color Matte. Pick a color and the matte lands where you need it. No File menu and no three dialogs.
- New Sequence. Creates a new sequence with the same settings, without matching them by hand.
- Transparency Grid. Turns the transparency grid on in one click, so you can check your cutouts.
- Unnest. Puts the clips of a nested sequence back on their tracks, in place, with their effects, keyframes and speed.
- Delete Empty Tracks. Removes every empty track at once. No dialog, no ticking boxes.
- Never overwrites a clip. New layers go on the first free track above. If there is none, Mako adds one.
- A tidy project. Adjustment layers live in a Mako bin and get reused, so your project doesn't fill up.
- Your own shortcuts. Give any button a key that works while you are in the timeline.
How to use it
Mako is free, so getting started is quick. Here is how to install it and use each button.
Step 1: Download and install Mako
Add Mako to your cart and check out. It costs $0, so no card is needed. Your download appears right after checkout on the order confirmation page, and the link is emailed to you too. Run the installer and it puts the panel in Premiere Pro.
Step 2: Open and dock the panel
In Premiere Pro, go to Window > Extensions > Mako. Dock it wherever you like. Next to the Tools panel works well, because Mako lays its buttons out in a column when it is narrow and in a row when it is wide.
Step 3: Add adjustment layers and color mattes
Select the clips you want to affect and click Adjustment Layer. Mako places it right over your selection, on the first free, unlocked track above, trimmed to fit. With nothing selected, it covers five seconds from the playhead. Then add your effects to it as usual.

For a solid background or a colored flash, click Color Matte, pick a color in the Color Picker and press OK. The matte lands in the timeline using the same placement rules as adjustment layers.

Step 4: Check cutouts with the transparency grid
When you remove a background or key out a green screen, you want to see exactly what is transparent. In Premiere Pro, the transparency grid is tucked away in the Program monitor's settings menu. In Mako it is one button: click Transparency Grid to switch it on.

Step 5: Unnest a nested sequence
Premiere Pro has no unnest command, so normally you would turn off nesting, drag the sequence back in, line it up and delete the nest. With Mako, select the nested sequence in your timeline and click Unnest. Its clips go back on their tracks, in place, with their effects, keyframes, speed, names and on/off state, and linked audio stays linked. If a clip can't be rebuilt (for example a title, a multicam clip or a time-remapped clip), Mako leaves the nest as it is, and each step can be undone. Keyframe easing, masks, transitions and effects applied to the nest itself don't come along, the same as when you unnest by hand.

Step 6: Clean up and add shortcuts
At the end of an edit, click Delete Empty Tracks to clear every empty track in one go. Use New Sequence whenever you need another sequence with the same settings as the current one. To work even faster, right-click any Mako button, choose Keyboard Shortcut and press a modifier plus a key, like Cmd + 7, or an F key on its own. Shortcuts work while you are in the timeline or the monitor, as long as the Mako panel is open (docked behind another tab is fine).

Who it is for
Mako is for every Premiere Pro editor, from beginners who don't want to dig through menus to professionals who add adjustment layers and mattes all day. It is free for good, with no license key, no account and no trial, so there is no reason not to try it.
FAQ
Is Mako really free?
Yes. There is no license key, no account and no trial. Check out for $0, download it and it is yours, updates included.
Which Premiere Pro versions does Mako support?
Mako works with Adobe Premiere Pro 2021 to 2026 on Windows and macOS.
How do I open Mako in Premiere Pro?
After installing, open it from Window > Extensions > Mako and dock it wherever you like.
Where do adjustment layers and color mattes go?
Over the clips you have selected, on the first free, unlocked track above them. With nothing selected they cover five seconds from the playhead. Mako adds a track when there is no free one and never overwrites a clip. If you also want smoother keyframes on the layers you animate, have a look at EaseFlow.
Six everyday jobs, one click each, for free. Get Mako for Premiere Pro.