

 by
by 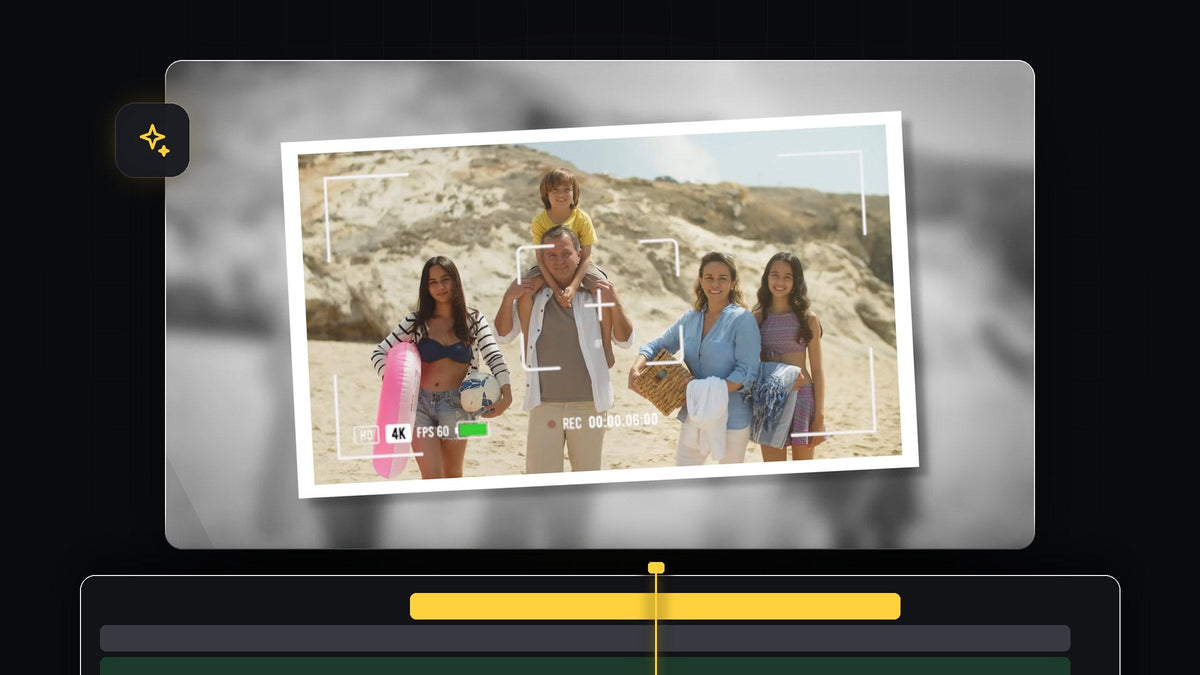
Watch the tutorial
Step 1: Freeze the frame
Move the playhead to the exact moment where you want the picture to be taken. Right-click the video clip in the timeline and choose Insert Frame Hold Segment. Premiere Pro splits the clip and inserts a still frame for a couple of seconds. You can delete any leftover video after the frozen frame, so the snapshot is the end of your shot.

Step 2: Make the background black and white
Select the frozen frame and open the Lumetri Color panel. Inside the Basic Correction tab, drag Saturation all the way down to -100 (or type it in). The picture becomes black and white, which will be your background. If you like, open the Vignette section and lower the Amount a little to darken the edges.

Step 3: Blur the background
Go to the Effects panel, search for Gaussian Blur and apply it to the frozen clip. In Effect Controls, raise the Blurriness value until you are happy with how soft the background looks. A strong blur helps the sharp photo in the front stand out.
Faster with BetterFX: skip the Effects panel. Press your BetterFX shortcut, type the first letters of Gaussian Blur and press Enter to apply it to the selected clip. Get BetterFX
Step 4: Duplicate the frozen frame for the photo
Hold Alt (Option on Mac) and drag the frozen clip up two tracks to duplicate it. Select the top copy, open Effect Controls and delete all the effects on it, so it is sharp and in full color again. Then scale the video layer down a tiny bit. This copy is the photo that will sit on top of the blurred background.
Step 5: Create a white border with a color matte
Go to the Project panel, create a Color Matte, choose white (or any color you want as a border) and click OK. Drag the matte onto the track below the duplicated video layer and trim it to the same length. With the matte selected, open Effect Controls, uncheck Uniform Scale, and adjust the Scale Height and Scale Width values until you get an even border around the image.

One click with Mako: the free Mako panel adds a color matte over the selected clips, at the playhead, on the first free track, in one click. Get Mako for free
If you want, you can add a camera overlay, such as a viewfinder, above the image for an extra camera look.
Step 6: Nest the photo and animate it
Select all the layers except the blurred background clip, right-click and choose Nest, then click OK. Now the photo, border and overlay behave as one object. Select the nested layer and scale it down in Effect Controls. Make sure you are at the start of the layer and create keyframes for Scale and Rotation and set values you like. Then move to the end of the layer, scale the image up a little and change the rotation. The photo now drifts and tilts slowly.

Step 7: Add the camera flash
Create an adjustment layer and drag it above the nested layer. Search the Effects panel for ProcAmp and apply it to the adjustment layer. Move the playhead to the cut where the snapshot begins, open Effect Controls and create a keyframe for Brightness. Increase the value to around 100, or around 60 if you want a softer flash. Then hold Shift, press the Left Arrow key twice to move back about ten frames and reset the brightness. Go back to the flash keyframe, move forward ten frames and press Shift + Right Arrow twice, then reset the value again. The picture now flashes white at the moment of the snapshot.

Tips
- Add a shutter sound. A camera click on the flash makes the effect feel real.
- Keep the flash short. A flash of around ten frames on each side works nicely.
- Try different borders. A cream or off-white matte gives the photo a vintage feel.
FAQ
How do I freeze a frame in Premiere Pro?
Right-click the clip at the frame you want and choose Insert Frame Hold Segment. This inserts a still frame into your timeline.
How do I make a white photo border?
Create a white color matte, place it under your image and scale it a little larger than the picture with Uniform Scale unchecked.
Can I use this for other cuts?
Yes. Copy the nested layers and adjustment layer to any other moment. You can also pair it with a freeze frame transition.
Want a quick way to flash between shots? Try the free shake transition preset.




