

 by
by 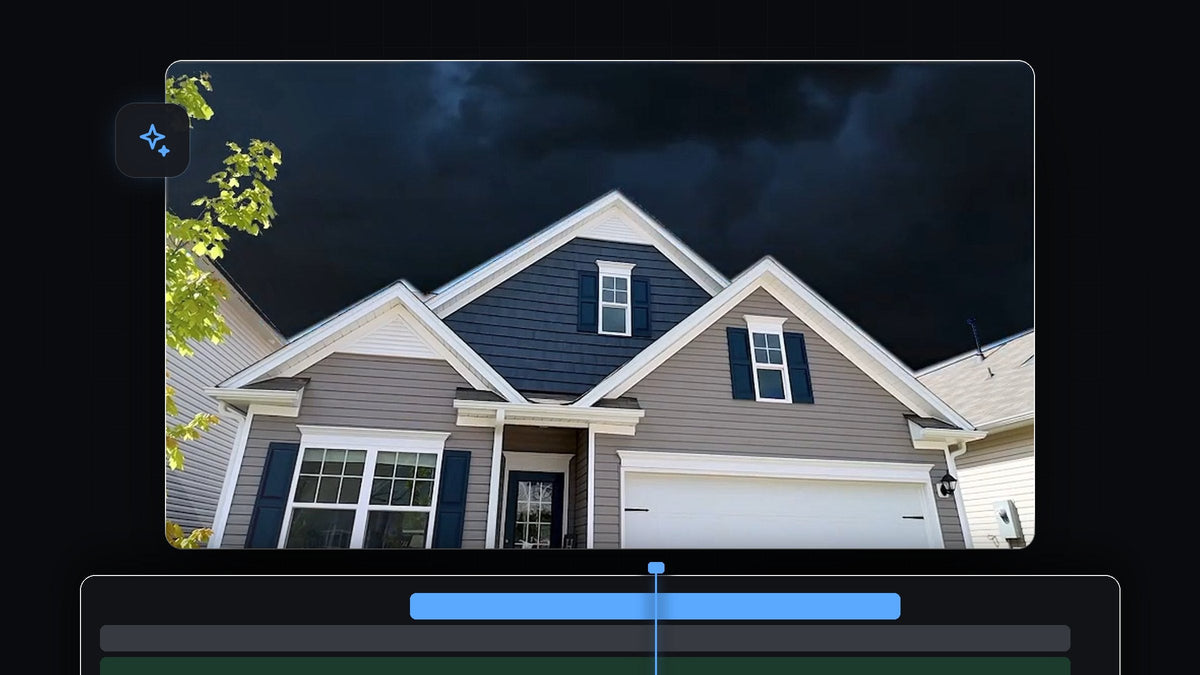
Watch the tutorial
Step 1: Stack your clips
Put the clip with the sky you want to replace, in this case a house shot from below, on V2. Place the new sky, a stormy clouds clip, on V1 directly under it. Make both clips the same length. The idea is simple: you will remove the old sky from the top clip so the new sky on the track below shows through.

Step 2: Add the Color Key effect
Open the Effects panel and search for Color Key. You will find it under Video Effects > Keying. Drag it onto the clip on V2, the one with the sky you want to remove. Then open Effect Controls and find Color Key in the list.

Faster with BetterFX: skip the Effects panel. Press your BetterFX shortcut, type the first letters of Color Key and press Enter to apply it to the selected clip. Get BetterFX
Step 3: Pick the sky color and raise the tolerance
Click the Key Color eyedropper and then click on a blue part of the sky in the Program Monitor. This tells Premiere Pro which color to remove. Now increase Color Tolerance so more shades of blue become transparent. As you raise it, the new clouds appear through the old sky. The video ends up with a fairly high value, around 139, but the right number depends on your footage.

Step 4: Protect the house with a mask
A high tolerance has a side effect: parts of your subject, like dark blue shutters or window glass, start to disappear too. The fix is a mask. Under Color Key in Effect Controls, click the pen or polygon mask icon and draw a path around the edge of your subject. To draw past the edges of the frame, zoom the Program Monitor out to 10% first. Then tick Inverted, so the key only works outside your shape, and set a small Mask Feather, around 10, to soften the edge.

Take your time on the roofline and the edges of the house, since this is where the old sky and the new one meet.
Step 5: Match the colors with Lumetri
The house still has bright daylight lighting, so it will look pasted onto a stormy sky. Select the house clip, open the Lumetri Color panel and bring the lighting closer to the sky. In the video, Temperature is pulled toward cooler blue, and Exposure and Contrast are lowered slightly. Adjust by eye until the house looks like it belongs in the new scene.

Tips
- Choose a sky with matching light. A sunny house will never look right under a dark storm. Pick a replacement sky with similar light direction.
- Use a clean shot. A sky with a flat, even color is the easiest to key out.
- Check edges at 100%. Zoom into the roofline and trees to see any blue fringe. If you see some, raise Edge Thin slightly.
- Keep learning. Masks are useful for many effects. See how to blur the background.
FAQ
Which effect removes the sky in Premiere Pro?
Use Color Key from Video Effects > Keying. Pick the sky color, then raise Color Tolerance.
Why does part of my subject disappear?
The tolerance is catching similar colors in your subject. Draw a mask around the subject and tick Inverted so only the sky is keyed.
How do I make the new sky look real?
Match the light and color of your subject to the new sky with Lumetri Color, lowering exposure and cooling the temperature for dark skies.
Want color looks ready to use? Try the Ultimate Color Presets Pack for Premiere Pro.




