by
by 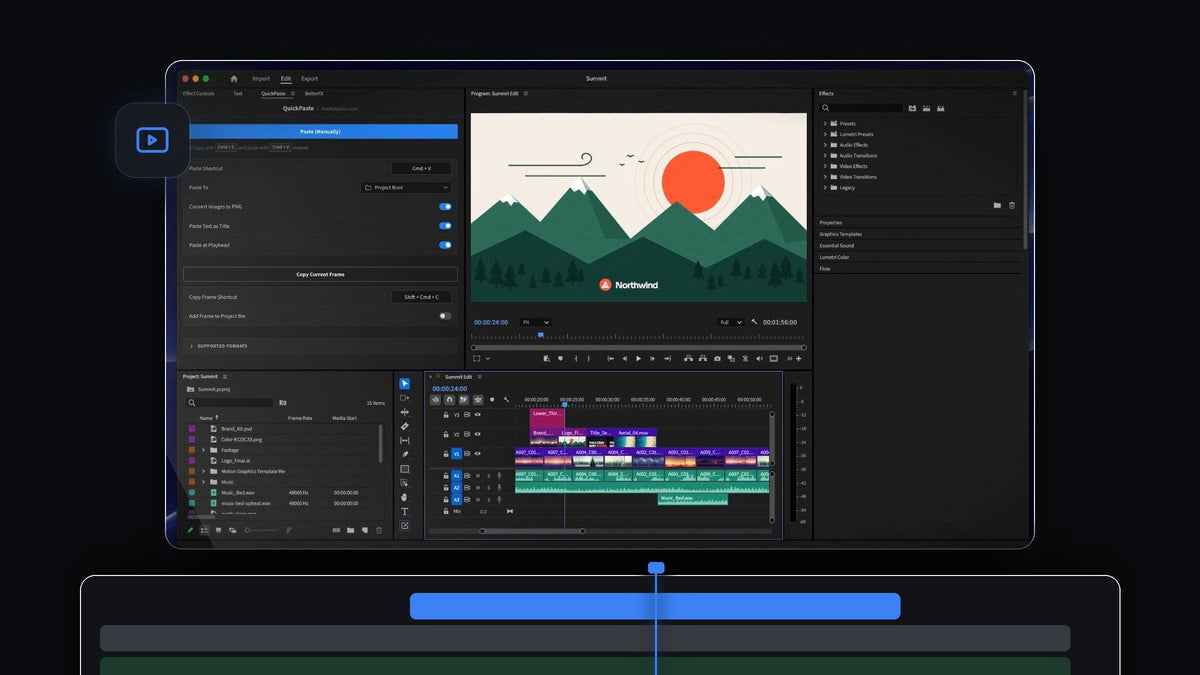
The short answer
Looking for an EditBuddy alternative for Premiere Pro? QuickPaste puts a copied image in your bin and on your timeline at the playhead with one Cmd + V (Ctrl + V on Windows), on Mac and Windows.
There's no panel to click into and nothing to drag. Copy, park the playhead, paste, and the image is in the cut.
Watch the intro
From clipboard to timeline in one keystroke
Tutorials, reviews, reaction videos and explainers live on images: screenshots, web pictures, logos and product shots. Each one used to mean saving a file, importing it and dragging it into place.
QuickPaste collapses all of that into the paste you already use. It works from anywhere in Premiere Pro, so your focus stays on the timeline while the images keep coming.
Step 1: Install QuickPaste
Your download is ready right after checkout and is emailed to you as well. Run the guided installer and it sets up the QuickPaste app and the Premiere Pro plugin. It supports Premiere Pro 2021 to 2026 on macOS and Windows.
Step 2: Turn on Paste at Playhead and pick your bin
Open the QuickPaste panel once. Switch on Paste at Playhead so every paste goes straight onto your timeline. Under Paste To, choose where the files live: their own bin, a bin you pick, or the project root.
Leave Convert Images to PNG on and every copied image arrives as a clean PNG. After that you never need to click into the panel to paste.
Step 3: Copy an image from anywhere
Right-click a picture in your browser and choose Copy Image, take a screenshot, or copy a file from Finder or File Explorer. Even a copied image link works.

Step 4: Park the playhead and press Cmd + V
Move the playhead to the moment the image should appear and press Cmd + V. QuickPaste imports the image into your bin and places it on the timeline at the playhead in the same move.

From there it's a normal clip. Trim it, scale it in Effect Controls and add motion. For ideas, see how to animate screenshots in Premiere Pro.
Step 5: Keep your project tidy
Every pasted image is a real file in your project, sitting in the bin you picked. Your project stays organized even after a hundred pastes, and you can find any image again in seconds.

Building a layered image sequence? Our Vox-style image animation tutorial pairs perfectly with a timeline full of pasted pictures.
More than images
- Adobe files. Photoshop, Illustrator, After Effects and MOGRT files come in as the real file.
- Vectors. SVG, PDF and EPS artwork pastes right in.
- Video and audio. Clips, music and sound effects, anything Premiere Pro imports.
- Colors. HEX, RGB, HSL, CMYK, OKLCH and CSS gradients.
- Text. Copy any line and paste it as a title.
- Frames out. Copy Current Frame copies the frame under the playhead as a full-resolution PNG.
Why QuickPaste is the best choice
- One keystroke. Your normal paste shortcut does the import and the placement.
- No panel clicks. Press paste from anywhere in Premiere Pro.
- Your shortcut, your bin. Record a custom paste shortcut and reset it in one click.
- Mac and Windows. The same experience on both.
- One-time price. $24.99 with lifetime access, free updates and a commercial license.
See every option in our QuickPaste guide, or see QuickPaste in the store.
FAQ
What is the best EditBuddy alternative for Premiere Pro?
QuickPaste. Press Cmd + V or Ctrl + V anywhere in Premiere Pro and the copied image lands in your bin and on your timeline at the playhead.
How do I paste an image directly onto the Premiere Pro timeline?
Install QuickPaste and switch on Paste at Playhead. Copy the image, place the playhead and press paste. The image is imported and placed in one step.
Do I need to click into the QuickPaste panel to paste?
No. You don't need to click into the panel first. Just press paste from anywhere in Premiere Pro.
Where do pasted images go in my project?
Into their own bin, a bin you choose, or the project root. You set it once under Paste To.
Copy, paste, and it's on the timeline. Get QuickPaste for Premiere Pro.