by
by 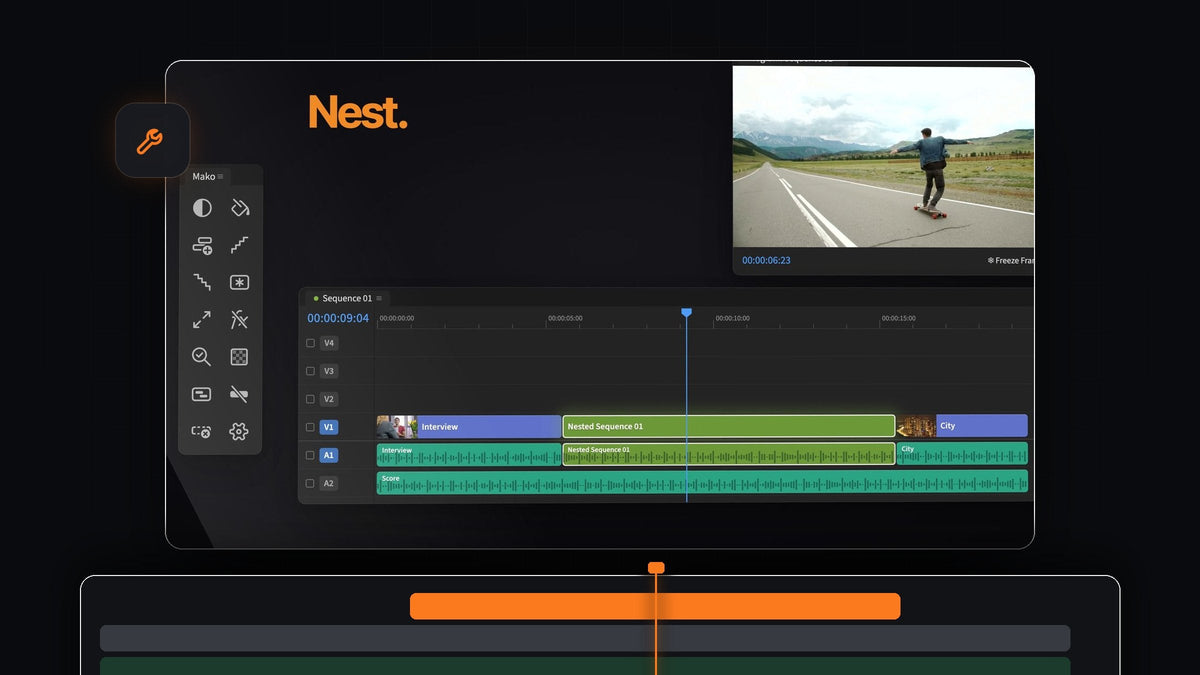
The short answer
Looking for a QuickNest Pro alternative for Premiere Pro? Mako nests the selected clips with one click and unnests them with another, free on Mac and Windows.
No dialog to name, no menu to dig through. Select, click, keep cutting.
Why nesting should take one click
Nesting is how you keep a long edit under control. You turn a montage, an interview section or a stack of layers into one tidy clip that you can move, trim and grade as a unit. The faster nesting is, the more often you actually use it.
In Premiere, nesting takes three manual steps and unnesting takes four. Mako turns both into a single click, and you can put each one on a key.
Step 1: Install Mako
Add Mako to your cart and check out for $0. There is no card, no account and no license key. The download is waiting on the order confirmation page, and we email you the link.
Run Mako.pkg on a Mac or MakoSetup.exe from the zip on Windows. Restart Premiere Pro and open Window > Extensions > Mako. It supports Premiere Pro 2021 and later.
Step 2: Select the clips to group
Drag a box around the clips or Shift-click them. You can select across several tracks at once, such as a clip and the freeze frame or graphic sitting above it.

Step 3: Click Nest
Click Nest. The selected clips become one nested sequence, right where they were on the timeline, with no dialog to fill in.
Now the whole section behaves like one clip. Add a single effect to the nest and it covers every shot inside, which is a quick way to give a section one look. To match that look elsewhere, see how to copy color grading in Premiere Pro.
Step 4: Click Unnest when you need the clips back
Select the nest and click Unnest. Every clip goes back on its own track, in place, so the timeline looks just as it did before you nested.

Clips keep their effects, keyframes, speed, names and on/off state, and linked audio stays linked. If a clip can't be rebuilt, such as a title, a multicam clip or a time-remapped clip, Mako leaves the nest as it is. Each step can be undone.
Step 5: Put Nest and Unnest on your keyboard
This is where the round trip gets really fast. Right-click Nest and choose Keyboard Shortcut, then press a modifier and a key. Do the same for Unnest. You can also set every shortcut on the Shortcuts tab in Settings.

Shortcuts work whenever Premiere is in front and the Mako panel is open, even docked behind another tab. Select, press, done.
Everything else a nest-heavy edit needs
Nest and Unnest are two of 13 buttons in the Mako panel. These pair especially well with them:
- New Sequence. An empty sequence with the settings you're already in, opened in its own tab.
- Delete Empty Tracks. Clears every empty track at once after you rearrange.
- Staircase and Unstaircase. Step clips a track higher before you nest a layered build, then flatten them again.
- QC Check. Closes empty gaps and marks offline media, switched-off clips and tiny clips before export.
- Adjustment Layer. One over the selection, one per clip with Shift-click, or one on every cut with Cmd-click.
Mako never overwrites a clip, keeps adjustment layers and freeze frames in a Mako bin, and updates itself in the background. Opening nests is the focus of our guide to unnesting with Mako, and the complete Mako guide covers every button.
FAQ
What is the best QuickNest Pro alternative for Premiere Pro?
Mako. Select clips and click Nest to group them, then click Unnest to put them back in place with their effects and keyframes. It's free on Mac and Windows.
Can I nest clips without the Nest dialog?
Yes. Mako's Nest button puts the selected clips into a sequence of their own with no dialog.
Does Unnest keep effects and keyframes?
Yes. Effects, keyframes, speed, clip names and on/off state come back with the clips, and linked audio stays linked.
Can Nest and Unnest have their own shortcuts?
Yes. Every Mako button can have its own keyboard shortcut, set by right-clicking the button or on the Shortcuts tab in Settings.
Group and ungroup your edit in one click each. Get Mako for free.