by
by 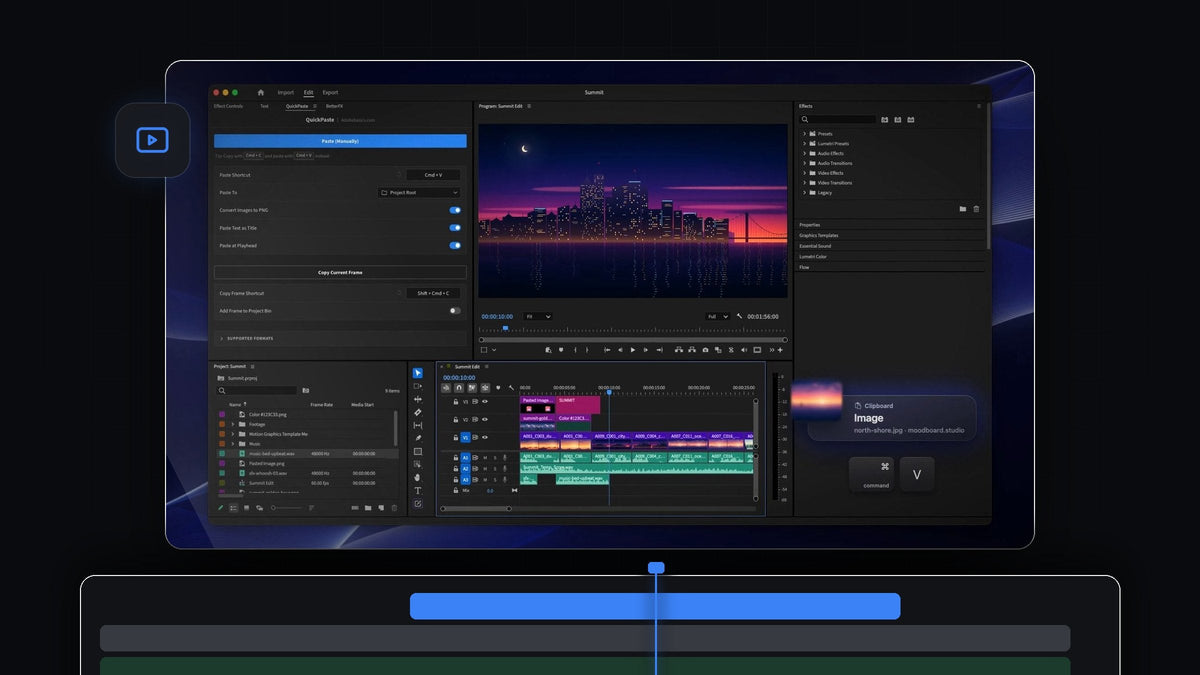
The short answer
Want the imgPaster feel inside Premiere Pro? QuickPaste pastes any copied image straight into your project with Cmd + V (Ctrl + V on Windows) and turns it into a clean PNG on the way in.
Screenshots, phone photos, web images and camera RAW files all take the same route, and you decide which bin they are saved to.
Watch the intro
Every image, one clean format
Images reach an editor in every format imaginable. iPhone photos arrive as HEIC, web images as WebP or AVIF, photographers send RAW, and screenshots sit on the clipboard without ever becoming a file.
QuickPaste gives all of them one path into Premiere Pro. Every copied image becomes a PNG before it reaches your project, so there is no converting by hand and no detour through another app. You copy, you paste, and the picture is ready.
Step 1: Install QuickPaste
Your download is ready right after checkout and the link is emailed to you too. The guided installer for Mac or Windows sets up the QuickPaste app and the Premiere Pro plugin. It works with Premiere Pro 2021 to 2026.
Step 2: Copy any image, in any format
Take a screenshot to the clipboard, copy a photo from an app, right-click an image on a web page and copy it, or select image files in Finder or File Explorer and press Cmd + C. You can copy several files in different formats at once.

Step 3: Paste and let it convert
Switch to Premiere Pro and press Cmd + V from any panel. QuickPaste converts each image to a PNG as it pastes. An iPhone HEIC becomes a PNG, a Nikon NEF becomes a PNG, a WebP from a store page becomes a PNG.
Turn on Paste at Playhead and every image also drops onto your timeline at the playhead, in order. That makes it quick to lay out a photo slideshow and then fit each picture to the frame.

Step 4: Choose where your images are saved
Open the QuickPaste panel and use Paste To. Pasted images can go into their own bin, into a bin you pick, or into the project root. Choose a bin like Stills once, and every screenshot and photo is filed there from then on.
Prefer to keep an image in its original format? Switch Convert Images to PNG off. Most editors leave it on, because a PNG is ready to use on any timeline.

Image formats QuickPaste handles
- Photos and graphics. PNG, JPEG, GIF, WebP, HEIC, AVIF, TIFF and BMP.
- Camera files. RAW images become PNGs too.
- From the web. Copied images and even image links. Nothing to download first.
- Vectors and documents. SVG, PDF and EPS are converted as you paste.
Beyond images, QuickPaste also pastes Photoshop, Illustrator, After Effects and MOGRT files as the real file, plus video, audio, colors and text. Prefer the plain keyboard flow? Our Cmd + V guide for Premiere Pro covers it, and the complete QuickPaste guide covers every setting.
Why editors choose QuickPaste for images
- One shortcut. Cmd + V or Ctrl + V, the same keys you already use.
- No conversion step. Every image arrives as a clean PNG.
- Organized. Images land in the bin you choose.
- Mac and Windows. It works the same on both.
- Pay once. $24.99 one-time, with lifetime access and free updates.
FAQ
What is the best imgPaster alternative for Premiere Pro?
QuickPaste. Copy any image and press Cmd + V or Ctrl + V in Premiere Pro. It arrives as a clean PNG in the bin you choose.
Can I paste a screenshot directly into Premiere Pro?
Yes. Copy the screenshot to the clipboard and paste it in Premiere Pro. There is no need to save it as a file first.
Does QuickPaste handle HEIC and RAW photos?
Yes. HEIC, AVIF, WebP, RAW and other formats are converted to PNG as you paste.
Where are pasted images saved?
Into their own bin, a bin you pick, or the project root. You set it once with Paste To in the QuickPaste panel.
Copy any picture, paste a ready PNG. Get QuickPaste for Premiere Pro.